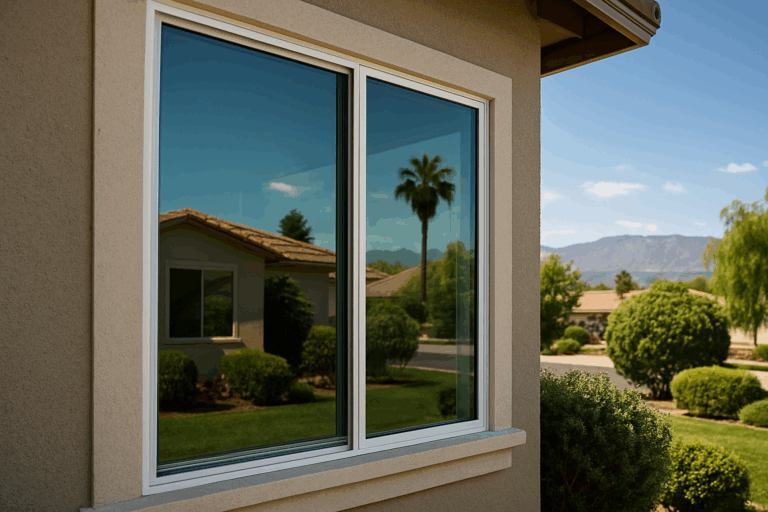
What is Window Tinting?
Window tinting is the process of applying a thin, transparent film to the interior or exterior surfaces of glass windows. This film is designed to block a portion of the sun’s rays, including ultraviolet (UV) and infrared radiation, while still allowing visible light to pass through.
The primary purpose of window tinting is to provide several benefits, including:
- Privacy: Tinted windows obscure the view from the outside, offering increased privacy for homeowners or businesses.
- UV Protection: The tinting film acts as a barrier against harmful UV rays, which can cause fading and damage to interior furnishings, fabrics, and artwork over time.
- Energy Efficiency: By blocking infrared rays, window tinting helps regulate indoor temperatures, reducing the burden on air conditioning systems and potentially lowering energy costs.
- Glare Reduction: Tinted windows minimize glare from the sun, creating a more comfortable living or working environment and reducing eye strain.
- Shatter Resistance: Many window tinting films are designed to hold glass together in the event of breakage, providing an added layer of safety and security.
Window tinting is a popular choice for both residential and commercial properties, offering a cost-effective solution for enhancing privacy, protecting interiors, and improving energy efficiency.
Types of Window Tint Films
Window tint films come in various types, each offering different levels of heat rejection, UV protection, and aesthetic appeal. Here are the main types of window tint films:
Dyed Window Tint Films: These are the most basic and affordable window tint films. They are made by injecting dye into a thin polyester or metallic film. Dyed films primarily block visible light and provide some heat rejection, but they offer minimal UV protection. They can fade or change color over time due to exposure to sunlight.
Metalized Window Tint Films: Metalized films contain microscopic metallic particles, typically aluminum, that are coated onto a polyester base. These films offer superior heat rejection and UV protection compared to dyed films. They also provide a sleek, mirrored appearance. However, metalized films can interfere with electronic signals, affecting radio, GPS, and cellular reception.
Ceramic Window Tint Films: Considered the premium option, ceramic window tints are non-metallic and made from ceramic particles embedded in a polyester film. They provide excellent heat rejection and UV protection while allowing good visibility and minimal interference with electronic signals. Ceramic tints are more expensive but offer superior performance and longevity.
Hybrid Window Tint Films: As the name suggests, hybrid films combine various technologies, such as dyed and metalized or ceramic and metalized components. They aim to provide the best features of different film types, offering a balance of heat rejection, UV protection, and visibility while minimizing potential drawbacks.
Carbon Window Tint Films: Carbon window tints are made from a carbon-based compound layered onto a polyester film. They offer exceptional heat rejection and UV protection while maintaining a non-reflective, sleek appearance. Carbon films are also known for their durability and resistance to fading or discoloration over time.
Each type of window tint film has its unique advantages and drawbacks, making it essential to consider your specific needs and preferences when choosing the right option for your home or vehicle.
DIY vs. Professional Window Tinting
When it comes to residential window tinting, homeowners have the option to either attempt a DIY installation or hire professional window tinting services. Both approaches have their advantages and disadvantages, and the choice ultimately depends on factors such as budget, skill level, and desired results.
DIY Window Tinting
Pros:
- Cost-effective: DIY window tinting kits are generally less expensive than professional installation.
- Convenience: You can complete the project at your own pace and schedule.
- Hands-on experience: It allows you to learn a new skill and take pride in the completed work.
Cons:
- Steep learning curve: Proper window tinting techniques require practice and experience.
- Potential for errors: Mistakes in measurement, application, or alignment can lead to unsatisfactory results.
- Limited warranty: Most DIY tinting kits offer limited or no warranty for the film or installation.
- Time-consuming: The process can be tedious, especially for larger windows or multiple rooms.
Professional Window Tinting
Pros:
- Expertise and experience: Professional tinters have the necessary skills and knowledge for flawless installations.
- Quality materials: Reputable companies use high-quality tinting films from trusted manufacturers.
- Warranty protection: Professional installations often come with comprehensive warranties for the film and workmanship.
- Efficient process: Experienced tinters can complete the job quickly and efficiently, minimizing disruption.
- Consistent results: Professionals can ensure consistent tint quality across all windows in your home.
Cons:
- Higher cost: Professional window tinting services typically cost more than DIY kits.
- Scheduling constraints: You may need to coordinate with the company’s availability for installation.
- Limited customization: Professionals may have specific film options and installation methods they prefer.
Ultimately, the decision between DIY and professional window tinting depends on your budget, skill level, and desired outcome. If you’re confident in your abilities and willing to invest time and effort, a DIY approach can be cost-effective. However, if you prioritize flawless results, long-term performance, and peace of mind, hiring professional window tinting services from a reputable company like Tint City may be the better choice.
Legal Requirements for Window Tinting
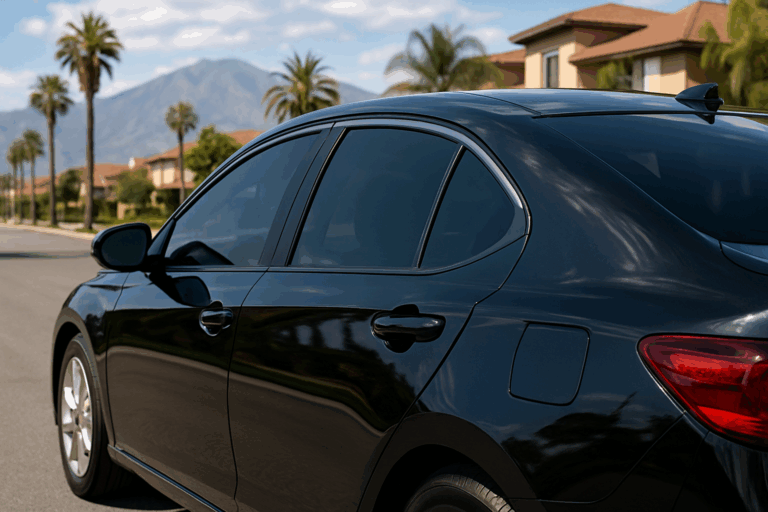
Window tinting laws and regulations vary from state to state and even between different cities or counties. It’s crucial to understand and comply with the legal requirements in your area to avoid potential fines or legal issues. Most states have specific regulations regarding the maximum tint darkness allowed for different vehicle windows, with stricter rules for the front windshield and driver/passenger side windows compared to rear windows.
In California, where Tint City operates, the legal limits for window tint darkness are as follows:
- Front Windshield: Non-reflective tint is allowed above the manufacturer’s AS-1 line (top 5 inches)
- Front Side Windows: Must allow at least 70% of light transmission
- Rear Side Windows: Any darkness is permitted
- Rear Window: Any darkness is permitted
It’s important to note that these regulations apply to sedans, coupes, and other passenger vehicles. Different rules may apply to multi-purpose vehicles (MPVs), trucks, and SUVs. Additionally, some states have specific exemptions or different requirements for vehicles used for certain purposes, such as limousines or vehicles with medical exemptions.
Failure to comply with window tinting regulations can result in fines, citations, or even the requirement to remove the tint altogether. It’s always advisable to consult with local authorities or a reputable window tinting professional to ensure compliance with the latest laws and regulations in your area.
Preparing for DIY Window Tinting
Before attempting to tint your home’s windows yourself, proper preparation is crucial for achieving professional-looking results. Here’s what you’ll need to gather and do:
Tools and Materials Needed:
- Window tint film rolls (choose the desired shade and type)
- Squeegee (a quality squeegee with a felt edge is recommended)
- Utility knife or razor blade scraper
- Spray bottle filled with a soap and water solution
- Lint-free cloths or paper towels
- Masking tape
- Scissors or a straight edge for cutting the film
- Measuring tape
- Slip solution or application fluid (helps position the tint film)
Window Cleaning and Preparation Steps:
- Clean the Windows Thoroughly: Remove any dirt, grime, or residue from the glass surfaces using a glass cleaner and lint-free cloths. Ensure the windows are spotless and free from any contaminants that could interfere with adhesion.
- Mask Off the Window Frame: Use masking tape to cover the window frames and any areas you don’t want the tint film to touch. This will help achieve clean edges and prevent accidental adhesion to unintended surfaces.
- Measure the Windows: Carefully measure the dimensions of each window, including the height, width, and any unique angles or curves. This will help you determine the correct size of tint film needed and plan for any necessary trimming.
- Cut the Tint Film: Unroll the tint film and use a straight edge or scissors to cut it to the appropriate size, allowing for a few extra inches on each side for trimming later.
- Prepare the Application Solution: Mix the slip solution or application fluid according to the manufacturer’s instructions. This solution will help the tint film glide smoothly over the glass during installation.
- Spray the Window and Film: Lightly mist both the window surface and the adhesive side of the tint film with the application solution. This will create a slippery barrier, allowing you to position and adjust the film as needed.
By taking the time to properly prepare your workspace, gather the necessary tools, and clean the windows thoroughly, you’ll increase your chances of achieving a professional-looking window tint installation.
DIY Window Tinting Installation Process
Attempting to tint your home’s windows yourself can be a challenging task, but with the right preparation, tools, and techniques, it is possible. Here’s a step-by-step guide to help you through the DIY window tinting installation process:
- Prepare the Work Area: Choose a clean, dust-free space with good lighting to work in. Lay down drop cloths to protect the surrounding area from any spills or debris.
- Clean the Windows: Thoroughly clean the windows, ensuring they are free of dirt, grease, and any other contaminants. Use a glass cleaner and a lint-free cloth to achieve a streak-free finish.
- Measure and Cut the Tint Film: Carefully measure the dimensions of each window and cut the tint film to size, allowing for a small overlap on all edges. Use a sharp utility knife and a straight edge for precise cuts.
- Apply the Mounting Solution: Spray the mounting solution (typically a soap and water mixture) onto the window surface and the adhesive side of the tint film. This will allow for easier positioning and adjustments during installation.
- Position the Tint Film: Starting from the top, carefully place the tint film onto the window, using a squeegee to smooth it out and remove any air bubbles or creases. Work your way down, applying firm pressure with the squeegee.
- Trim the Excess Film: Once the film is properly positioned, use a sharp knife or razor blade to trim away any excess tint film around the edges of the window frame.
- Squeegee and Dry: Use the squeegee to apply firm, overlapping strokes, pushing out any remaining mounting solution and air bubbles. Wipe away any excess solution with a clean, dry cloth.
- Allow Proper Curing Time: After installation, allow the tint film to cure and dry completely, following the manufacturer’s recommended curing time. This can take anywhere from a few days to a week, depending on the type of film used.
Throughout the installation process, it’s essential to work slowly and methodically, ensuring proper alignment and avoiding any creases or bubbles. Patience and attention to detail are key to achieving a professional-looking result.
Additionally, consider investing in the right tools, such as a quality squeegee, measuring tape, and a sharp utility knife, to make the process easier and more precise. Proper preparation and technique can help you achieve a successful DIY window tinting project.
Common DIY Window Tinting Mistakes
Attempting to tint your home’s windows as a DIY project can be a tempting idea, promising cost savings and a sense of accomplishment. However, it’s crucial to understand the potential pitfalls and common mistakes that can arise during the process. Overlooking these issues can lead to unsatisfactory results, compromising the appearance and functionality of your window tinting.
Bubbles and Creases: One of the most frequent issues encountered in DIY window tinting is the formation of bubbles and creases. These imperfections occur when the tint film is not applied correctly or when air becomes trapped between the film and the glass surface. Bubbles and creases not only detract from the overall aesthetic but can also weaken the tint film, leading to premature peeling or cracking.
Uneven Application: Achieving a smooth, consistent application of the tint film across the entire window surface is a challenging task, especially for DIY enthusiasts without proper training and experience. Uneven application can result in visible seams, overlaps, or gaps, which can be visually distracting and compromise the effectiveness of the tinting.
Improper Cleaning and Preparation: Proper cleaning and preparation of the window surface are crucial steps that are often overlooked in DIY window tinting projects. Residual dirt, grease, or contaminants on the glass can prevent the tint film from adhering properly, leading to premature peeling or bubbling. Inadequate preparation can also result in a hazy or cloudy appearance, diminishing the intended aesthetic and functional benefits of the tinting.
Misalignment and Trimming Issues: Precisely aligning and trimming the tint film to fit the window frame can be a challenging task, especially for irregularly shaped or curved windows. Misalignment or improper trimming can result in gaps or overlaps, compromising the overall appearance and potentially allowing light to leak through.
Damage to Window Seals and Frames: Improper handling or application techniques during DIY window tinting can inadvertently damage the window seals or frames. This can lead to potential leaks, drafts, or even structural issues, compromising the overall integrity and energy efficiency of your home’s windows.
While DIY window tinting can be a rewarding project for some homeowners, it’s essential to be aware of these common mistakes and their potential consequences. Considering the complexity of the task and the potential for costly errors, many homeowners opt to entrust their window tinting needs to professional service providers who have the necessary expertise, tools, and experience to ensure a flawless installation.
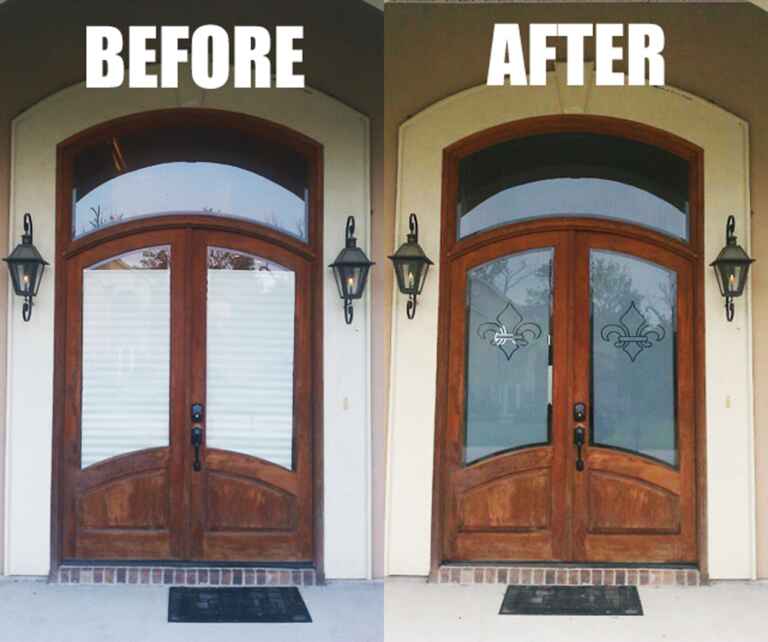
Professional Window Tinting Services
Hiring professional window tinting services is often the recommended choice for homeowners seeking high-quality results and a hassle-free experience. While DIY window tinting can be a cost-effective option, it comes with several challenges and potential pitfalls that may compromise the final outcome.
Benefits of Professional Window Tinting Installation:
- Expertise and Experience: Professional window tinters have extensive training and years of experience in handling various types of window films and installations. They understand the nuances of different window shapes, sizes, and materials, ensuring a flawless application every time.
- Proper Tools and Techniques: Professionals use specialized tools and techniques to prepare the windows, apply the tint film, and ensure a seamless finish. They have access to high-quality tint films, cutting tools, and application solutions tailored for optimal results.
- Warranty and Quality Assurance: Reputable window tinting companies stand behind their work and offer warranties on both labor and materials. This gives homeowners peace of mind, knowing that any issues or defects will be addressed promptly and professionally.
- Efficient and Timely Installation: With their experience and specialized equipment, professional tinters can complete the installation process quickly and efficiently, minimizing disruptions to your daily routine.
Professional Window Tinting Process Overview:
- Consultation and Measurement: The process begins with a consultation, during which the professionals assess your specific needs, discuss tint options, and take precise window measurements.
- Window Preparation: The windows are thoroughly cleaned and degreased to ensure proper adhesion of the tint film. Any existing window film or debris is carefully removed.
- Film Cutting and Application: Using high-quality tint films and specialized cutting tools, the professionals precisely cut and apply the tint film to each window, ensuring a perfect fit and minimizing the risk of bubbles or creases.
- Final Inspection and Curing: After installation, the professionals conduct a thorough inspection to ensure there are no imperfections or issues. They also provide instructions for proper curing, which allows the tint film to fully adhere and set.
Quality Guarantees:
Professional window tinting companies prioritize quality and customer satisfaction. They use high-grade tint films from reputable manufacturers, such as 3M, Llumar, or SunTek, ensuring durability, performance, and longevity. Additionally, their warranties often cover issues like bubbling, peeling, or discoloration, providing added protection for your investment.
By choosing professional window tinting services, homeowners can enjoy the benefits of enhanced privacy, UV protection, energy efficiency, and aesthetic appeal, all while avoiding the potential pitfalls and frustrations of a DIY installation.
Window Tinting Costs: DIY vs. Professional
When it comes to window tinting, the cost can vary significantly between DIY and professional services. DIY window tinting kits can be relatively inexpensive, typically ranging from $50 to $200, depending on the quality of the film and the number of windows you need to tint. However, it’s important to note that the cost of materials is not the only factor to consider.
Professional window tinting services can be more expensive upfront, with costs ranging from $200 to $500 or more, depending on the size of your home, the type of tint film used, and the complexity of the installation. However, professional services often come with warranties and guarantees, ensuring that the tint is installed correctly and will last for years to come.
One of the main advantages of professional window tinting is the expertise and experience of the installers. Professional tint shops have the necessary tools, techniques, and knowledge to properly prepare the windows, apply the tint film, and ensure a flawless finish. This can save you time, frustration, and potential costly mistakes that can occur with DIY installations.
Additionally, professional tint shops typically use high-quality, durable tint films that are designed to withstand the elements and provide long-lasting performance. These films may be more expensive than the ones found in DIY kits, but they can offer better heat rejection, UV protection, and overall longevity.
It’s also important to consider the potential for mistakes and rework when attempting a DIY window tinting project. If the tint film is not applied correctly, it can lead to bubbles, creases, or peeling, which can compromise the appearance and performance of the tint. In such cases, you may need to remove and reapply the tint, incurring additional costs and time.
Ultimately, the decision between DIY and professional window tinting services will depend on your budget, skill level, and the level of quality you desire. While DIY window tinting can be a cost-effective option for those on a tight budget, professional services can provide peace of mind, superior results, and long-term value for your investment.
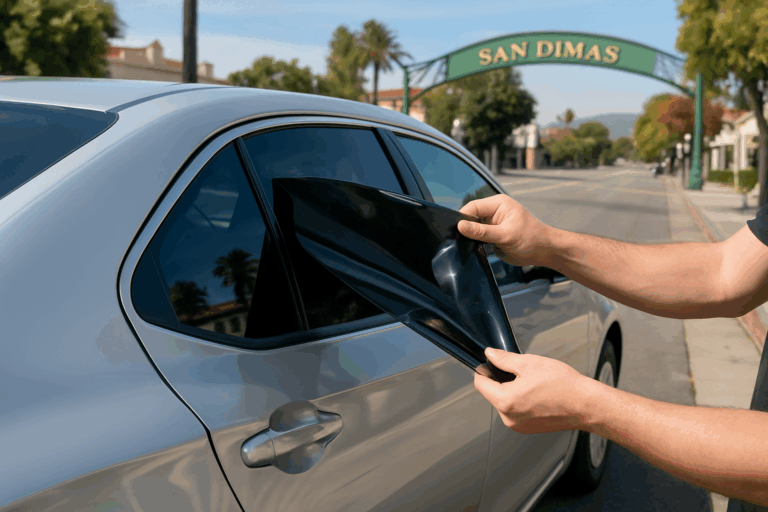
Tint City: Professional Window Tinting Provider
Tint City is a trusted provider of professional window tinting services in Southern California. With four convenient locations in San Dimas, Loma Linda, Corona, and Rancho Cucamonga, Tint City offers expert installation and top-quality products for both residential and commercial clients.
Tint City is a certified 3M™ Prestige Window Film dealer, ensuring that their customers receive the highest standard of window tinting solutions. The 3M™ Prestige Series is renowned for its exceptional performance, durability, and clarity, making it an ideal choice for homeowners seeking to enhance their living spaces.
With years of experience and a team of highly trained technicians, Tint City takes pride in delivering flawless window tinting installations. Their professionals meticulously prepare each surface, ensuring a seamless application and long-lasting results. Whether you’re looking to reduce heat and glare, increase privacy, or add a touch of style to your home, Tint City has the expertise to meet your specific needs.
Committed to customer satisfaction, Tint City offers personalized consultations to help you select the perfect window tinting solution for your property. Their knowledgeable staff will guide you through the various options, considering factors such as climate, sun exposure, and aesthetic preferences, to ensure a tailored solution that exceeds your expectations.
Making the Right Choice for Your Home
Deciding whether to pursue DIY window tinting or opt for professional services is a crucial decision that can significantly impact the outcome and longevity of your window tinting project. Here are some key factors to consider:
Skill Level and Experience: Window tinting is a delicate process that requires precision, attention to detail, and proper techniques. If you lack experience in handling tint films and tools, it’s easy to make mistakes that can lead to bubbles, wrinkles, or uneven tinting. Professional tinters have the necessary skills and experience to ensure a flawless installation.
Quality of Materials: Professional tinting companies like Tint City use high-quality, durable tint films from reputable manufacturers like 3M. DIY tint films may be less expensive, but they often lack the same level of quality, resulting in shorter lifespans and potential discoloration or peeling over time.
Time and Effort: DIY window tinting can be a time-consuming and labor-intensive process, especially if you have multiple windows or large glass surfaces. Professional tinters have the proper equipment and expertise to complete the job efficiently, saving you time and effort.
Warranty and Guarantees: Reputable tinting companies like Tint City often provide warranties or guarantees on their workmanship and materials. This added protection can give you peace of mind and ensure that any issues are addressed promptly. DIY tinting typically lacks such guarantees.
Resale Value: If you plan to sell your home in the future, professionally installed window tinting can be a selling point and potentially increase your property’s value. DIY tinting may not have the same appeal to potential buyers and could even be a deterrent if not done properly.
Safety and Compliance: Window tinting laws and regulations vary by state and local jurisdiction. Professional tinters are well-versed in these regulations and can ensure that your tinting complies with legal requirements. DIY tinting may inadvertently violate laws, leading to potential fines or legal issues.
Ultimately, the decision between DIY and professional window tinting depends on your skill level, budget, time constraints, and the importance you place on quality, longevity, and compliance. For many homeowners, the expertise and peace of mind offered by professional tinting companies like Tint City make it a worthwhile investment.